How to setup IPTV on MAG with MAC address
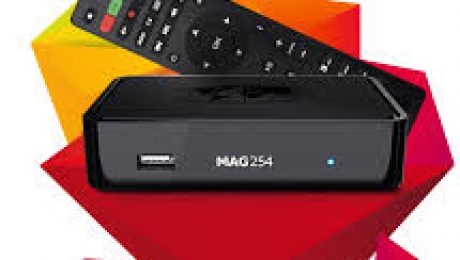
Our IPTV service works on MAG boxes with MAC address registeration. Here is how:
Step 1. Firstly, to settings, then system settings in the “inner portal”.
Step 2. Navigate to “software update”, press OK, and then “red button” to update the box’s software. Be patient when the box will restart.
Step 3. Go to Servers/General and write pool.ntp.org and press OK. Go back.
Step 4. Navigate to Portals and on Portal 1 , set it up with this information:
Portal name: Upmaker
Portal URL: http://iptv.#####.com:8080/c/
Step 5. Press OK to save (You can go to Advanced settings to change the time zone of the EPG, if this is necessary)
Step 6. Reboot your device and you can watch the channels if you have sent your MAC address to Upmaker support to register into the servers when ordering a subscription.
Step 7. Enjoy 😉
- Published in Articles, IPTV Tutorials
9 Easy Ways to accelerate your Wi-Fi for Streaming
9 Easy Ways to accelerate your Wi-Fi for Streaming
Wi-Fi connectivity is very important nowadays. You need it to watch stuff online, enjoy some video content and so on. The cool thing about Wi-Fi is that it allows you to stream videos, download files and so. Let’s face it, we all need a good Wi-Fi instead of just depending on wired internet all the time. That’s especially true if you need IPTV and other stuff like that. It makes a lot of sense to start using Wi-Fi right away. But many times the speed is a bit slow. Which is why we are here to help you speed up your Wi-Fi streaming process fast and easy. Here are some tips that will be able to help you.
Find the weak link

When your IPTV connection lacks good speed, there will most likely be a weak link in that regard. There are 3 things that can malfunction here. The server that provides streaming content might not work, the ISP is malfunctioning, or your Wi-Fi connectivity is not good at this time. You have to study every situation as you figure out which is the best approach here.
In the case of streaming servers, they keep your content on servers online. If you use something like Hulu or Netflix, then you won’t have to worry as they tend to have a very large bandwidth. Of course, if you experience loading hiccups, that may be due to the overall quality you watch the content at. HD or 4K content will obviously take a bit longer to stream. Test your connection to other streaming services and then make sure that every one of them delivers HD content. Fixing this issue from the streaming server side is not possible most of the time. You can go for a lower resolution, or you can switch to a premium streaming service.
When the issue comes from your internet connection, you should consider going to speedtest.net. That’s where you can see the current internet speed. If you want to stream 1080p, you will need 8 Mbps, whereas 4K content needs 25 Mbps. Fixing this problem is easy, in case you don’t have the right bandwidth, you just go to the internet service provider and buy more. Just make sure that you don’t pay too much for the bandwidth in case you don’t need it. Lowering the stream quality can also help.
Wireless connections can also be tested via speedtest.net. If your connectivity is good, but you have streaming problems, we created a list of things that you can do in such a situation!
Connect to the 5Ghz band
The reason why you want to switch to this band is that it’s more powerful and devices tend to transmit data a lot faster. Simply put, you get 23 channels instead of 3. Some other transmission technologies are only usable by the 5 GHz band, so there’s that. If the signal strength is not going to be a problem, then you need to make sure that you enable the 5 GHz band. You can do that by entering your browser and enabling it in the router settings. Keep in mind that only some of the newer models offer support for this. Study the Wi-Fi approach, and you will be more than happy with the results and the entire experience.
Change the Wi-Fi channel
It’s important to note that the Wi-Fi is very closely related to the band used by your router. The band will have multiple channels. The router won’t use all channels, only specific ones. That being said, you have to use an app like Wi-Fi Analyzer that will help you figure out what channels are used by every network. The idea here is to identify the channel that’s not used heavily, and then you go to the router interface and change the traffic to that channel. Every router will have specific instructions regarding the option of changing channels, but it will work quite nicely and you just have to adjust and adapt it, to say the least. But it will be worth it; you can rest assured of it.
Optimize the Wi-Fi signal
There are plenty of options to consider when it comes to stuff like this. One of them is antenna positioning. You want to be certain that the antennas are not obstructed, as that’s how you can get the best possible results. If possible, you can add an external antenna, especially if the router only has internal ones. Then you also have to think about router placement too. You want to keep it away from electric appliances as they can create interferences, so you want to avoid all of that as much as you can. Walls and other obstructions can also be problematic here.
Enable WMM and QoS
Some of the better routers that you can use for streaming will have quality of service features, and they can be adjusted and adapted manually, which is a very good thing. You can also start the WMM feature if you want to. The idea with this feature is that it was created to improve the sharing of audio, voice, and video via wireless networks. It’s important to double check the router documentation, as that’s where you can see all the information. It’s not going to be a walk in the park, but it can bring in front some nifty results all the time.
Try to use a signal extended
Let’s face it, no matter how powerful your router might be; it’s still limited to the location you are placing it at. The best thing that you can do is to purchase a wireless range extender. You have to place that at one point where the signal is very good, and the unit will extend the range quite a bit. You want to avoid any kind of rush in this perspective, so try to consider that. There are lots of companies like Netgear and TP-Link that offer range extenders, so you just have to take your time as you figure out the right option, and the ROI can indeed be more than ok in this perspective no matter the situation.
Upgrading your router
Even if you don’t use the router every day, it’s still a very good idea to update the router once a few years. New models include new features and better performance, sometimes they even have a better range, which is extremely important. Plus, if you have a new phone, you also want a new router that will help offer all the features you need.
If you think about upgrading the router for IPTV and other uses, it’s important to keep in mind a few features. A strong coverage and signal output will be great features. WMM support, 802.11ac compatibility as well as dual-band support are pretty much a necessity nowadays, so try to consider all of that as much as you can in that perspective. Of course, if you use your router solely for streaming, then you may want to visit Google as you try to access a list with the best routers for streaming.
Increase your security
Of course, getting a new router with amazing features doesn’t mean anything if the security is not a good one. Ideally, you want to make sure that you protect your wireless network with a very complex password. Use WPA-PSK if possible. Also, adding proper antivirus and anti-malware solutions on your devices is a very good idea. In case your network is slow, then you may want to test your devices to see if that comes from any virus on your computer. Sometimes your network might be used by malware for maleficent purposes, so you want to remove that software the best way that you can.
Lower the stream quality
Ideally, you want to keep the stream quality high. But if it still doesn’t work, then you can run a wired connection from your computer or purchase some powerline network adapters. If that won’t help, then you can keep using the Wi-Fi connection, but you have to lower the stream to 720p for example. It’s not a huge quality loss, so don’t stress too much about that. Just try to test multiple options as you find the right one for you.
As you can see, there are plenty of methods you can use to speed up your Wi-Fi for streaming. Sometimes this will take a little while to get the job done properly, other times it will require a bit of tinkering. But as a whole, you can still obtain some very good results, so try to consider that as much as you can. It’s going to bring in front a simple, better way to boost your IPTV results, so try to consider that. Just remember, the value that you can obtain this way is very impressive. Plus, do keep in mind that you have to change the router once a few years. Using these ideas will help you a lot, and it will also make the entire process very simple too. Just give these ideas a shot, and the results can be more than ok!
- Published in Articles, IPTV Tutorials
How to add m3u playlists to MAG Box 250/254/275
How to add m3u playlists to MAG Box 250/254/275
Step 1. Copy and paste the M3U link in an internet browser (i.e. Chrome, Firefox, etc) and Enter. Your M3U playlist will be downloaded. Save the m3u file as on your flash Memory (remember its name!).
Step 2. Insert the flash Memory to your device MAG device.
Step 3. On the main screen, press “Home Media” (embedded portal)
Step 4. Find your flash memory’s name and select it and then press OK.
Step 5. Choose your Upmaker m3u playlist, press OK.A message will be shown, asking if you want to add the channels, agree to that:
Step 6. Hit the F3 Yellow button on your remote to add the playlist.
Step 7. After the channels have been added, press TV button on the remote
Step 8. You can remove the flash memory from your box.
Step 9. There you have it! Enjoy your Upmaker subscription.
- Published in Articles, IPTV Tutorials
How To Play m3u Files on Enigma2
How To Play m3u Files on Enigma2
In this tutorial, we’ll walk you through setting up your IPTV subscription (with an m3u link) in your Enigma2 (Vu+/Dreambox) box. This can be done using a useful and free-to-use software client called putty. (here is their website: https://putty.org/)
Please follow these steps:
Step 1– Download puTTY
Step 2– Install puTTY
Step 3– Open putty
Step 4– Type the host name : local ip address for box
Step 5– input the connection type setting : “Telnet” and Enter
Step 6– Enter the username and password: ( user & password = root )
Step 7– Only put the username and password (replace the ***##) from your m3u link, in this template link (ask for your “auto script” if you can’t do this for any reason):
wget -O /etc/enigma2/iptv.sh “http://iptv.upmaker.com/get.php?username=***##&password=***##&type=enigma22_script&output=mpegts” && chmod 777 /etc/enigma2/iptv.sh && /etc/enigma2/iptv.sh
Step 8– Paste it in ssh section of puTTY
Step 9– Enter & be patient while it is being installed
Step 10– Reboot your receiver
Step 11– Go to your box “Favorites” and you should have a new bouquet of channels.
Step 12– Enjoy Your Upmaker Subscription!
- Published in Articles, IPTV Tutorials
How to setup IPTV on VLC media player
VLC is one of the most popular applications that people use to stream their premium IPTV channels.
The VLC media player’s popularity comes from the fact that it is an open source, portable and free software that works on many platforms and operating systems.
The cross-platform streaming media server and media player is produced, updated and maintained by the VideoLAN project.
The VLC media player works on both mobile and desktop operating systems. It works on OSs such as the Windows Phone, Windows 10 Mobile, Tizen, iOS, and Android.
Another thing that VLC has going for it is that it is one of the easiest applications to use as it does not need any technical expertise. It can be installed and setup by practically anyone.

This tutorial is a step by step guide on how to install iptv on your VLC media player with an IPTV subscription. The guide will show you how to download and install the VLC media player from VideoLAN.
We will also show you how to set up IPTV channels on the VLC media player that you downloaded onto your computer.
VLC Player (Available for Windows, Mac OS, and Android)
You can easily configure our service to work on VLC media player on Windows (and also Mac OS and android) , Using the M3U link in your subscription email. This tutorial is written for Windows but the same principle is used for Mac OS and Android.
Please do the following steps to set up your service:
Step 1- Download and Install VLC (available for free, https://www.videolan.org/vlc/index.html )
Step 2- After installation is complete, open the VLC Media Player.
Step 3- Click on “Media” on the Top-Left side of the Window.
Step 4- Choose “Open Network Stream”.
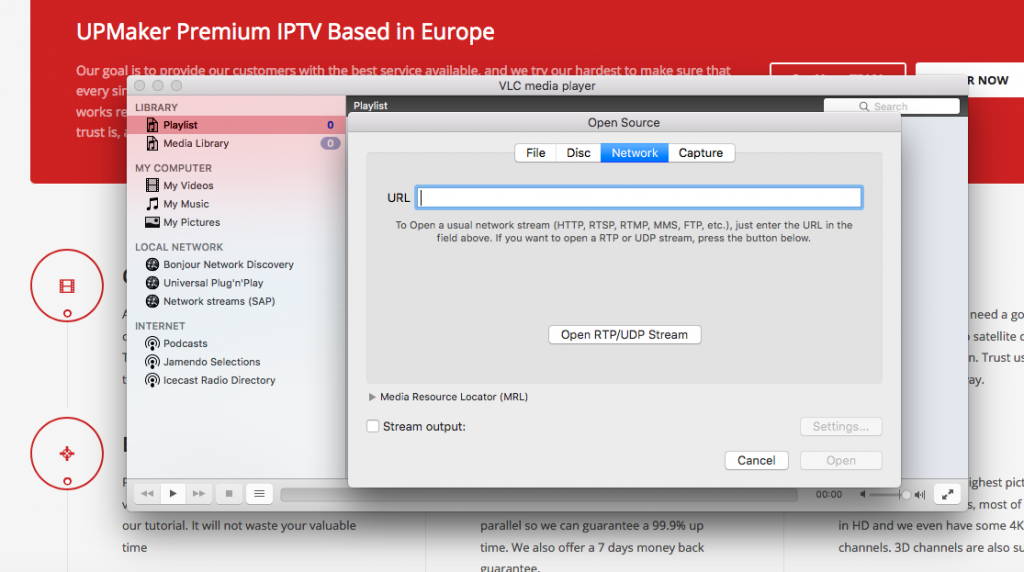
Step 5- Copy and paste the M3U link that you received in your subscription email.
Step 6- Stay patient while all of the channels are loading.
Step 7- Choose a channel and enjoy your Upmaker subscription.
Created By : Upmaker IPTV
- Published in Articles, IPTV Tutorials, Players, VLC
How to install UPMAKER IPTV on your Perfect Player (Android Devices)
How to install UPMAKER IPTV on your Perfect Player step by step:
You can easily configure our service on your android device using an m3u link. Your link will be sent in your subscription email. This can be done using several apps, including a free, yet powerful app named “Perfect Player IPTV”.
Please take the following steps:
Step 1. Download and install “perfect player IPTV” from play store on the desired android device and open it.
***You can also download it from here: http://apk-dl.com/perfect-player-iptv
Step 2. Tap on “setting” button. Go to “GENERAL” menu > playlist > Copy and paste your m3u link in the “playlist” field, and enter a name for it. For example, “Upmaker IPTV”. Tap on OK afterwards.
***Note: Please do not check the “VOD” option.
(optional): Step 3. Open EPG > copy and paste EPG link (can be found in the subscription email) in the EPG field > (Use the shift option to shift the time of all programs if Upmaker’s EPG is not synced in your country)
Step 4. In GUI > please enable “show channels group as folder” option
*** In the “playback” menu, make sure to choose a proper “decoder” or else you can’t watch some of the content. “software” decoder usually works well.
Step 5. In Advanced > enable download supposed logos
Step 6. After applying these, please make sure to “backup” your setting as a file and store it. This can be done in “defaults” menu. This will enable you to quick set up your app again in case you lose the configurations you made.
Step 7. Restart the app.
Step 8. Enjoy your Upmaker subscription!
- Published in Articles, IPTV Tutorials
How to Install IPTV on Smart TV – LG – Samsung
How to Install IPTV on Smart TV – LG – Samsung
Our subscriptions can be used directly in your smart TV (LG, Samsung, Amazon Fire, Bush and any other WebOS operating smart TV).
You need to take the following steps to configure your IPTV subscription on your Smart TV:
Step 1. Go to your TV’s specific app store (i.e. LG store for LG, Amazon store for Amazon fire, etc). Search for “Smart IPTV” and download the app.
(Click on this link to find more instructions on this app: http://siptv.eu/howto/ )
Step 2. Start the application. Look for your “MAC address” of your TV in that page.
Step 3. Now go to this web page: http://siptv.eu/mylist/
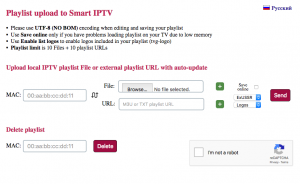
Step 4. On that page, pay attention to the section titled ‘Add external playlist links (URLs)’ and enter the MAC address that you read in STEP 2. in the “Link”, copy and paste the m3u link that you have received from us in the subscription email.
Step 5. Now, restart the Smart IPTV app in so that it will reboot with the changes we have made on it.
Step 6. After rebooting, you should be able to see your new Playlist of channels.
Step 7. Enjoy your Upmaker subscription!
Note: This application (smart IPTV) has integrated EPG support.
- Published in Articles, IPTV Tutorials
How to install IPTV on iPhone and iPad
How to install IPTV on iPhone and iPad (ios) via “GSE Smart IPTV”
The M3U link that you receive in your subscription can be used in many apps on IOS (apple phones, tablets and smart TVs). Some of these apps are not free to use.
However, GSE IPTV is a versatile and free app that you can use on your IOS (and android) devices.
download GSE Smart IPTV from app store.
Step 1-Install the app and then go to Remote Playlists from the app menu (the three lines)
Step 2- Tap on the plus icon now.
Step 3- Tap on Add M3U URL
Step 4- Input Upmaker IPTV in Playlist name
Step 5- Copy and paste the M3U link that was sent to you in your Upmaker subscription email in Playlist link (Make sure to remove all the text that is already in the field)
Step 6- tap on Add
There you have it!
Now go back to Remote playlists (in Step 1) and tap on Upmaker IPTV and you can see the channels listed by the countries.
Pick your desired country and select the channel that you want.
Enjoy your IPTV Subscription.
- Published in Articles, IPTV Tutorials
A Short Primer to CCcam Server & Cardsharing
A Short Primer to CCcam Server & Cardsharing
One of the best ways of catching your favorite TV programs and other TV contents is through CCcam and Card-sharing. You can watch them in real time as it happens whenever and wherever in the world they are broadcast from.
Europe and Globe
we support all European countries and all countries across the globe. For regular individuals like you and me, the mention of the methods in doing this is intimidating. It would sound as if one should possess a thorough technical knowledge of electronics and must be a complete computer expert.
To cut through the gobbledygook of highfaluting technical language, CCcam and Card-Sharing is simply a system wherein many clients (TV receivers) are allowed to have access to a subscription network with only one valid subscription card.
This is done through the electronic sharing of the subscription card’s data by all the sharers. This enables all the sharing clients to have the same-time access to the scrambled DVB streams (the many signals from the subscribed TV networks) which comes encrypted. (If the access is successful, the contents are available for viewing.)
CCcam is the server that controls the operations. Card-sharing, which is self-explanatory, means one subscription card is used and shared by many users.
Benefits
This technical innovation definitely has benefits to its users, the card sharers. Consider this scenario.
You are flipping the many channels on your TV. You passed by several channels which you have heard about or may have known their contents. Yet, unfortunately, you cannot open and see their contents because they are all locked.
Locked here means these channels are encrypted and are not available for you to view. Your regular satellite dish receiver can only show you your paid-for channels. You cannot unlock (decrypt) the other channels that are closed without paying.
First, your system is not designed to support card-sharing. Second, it is unable to run the software for CCcam protocol.
However, there are now ways to connect your TV system to your chosen CCcam server.
Sharing
There are now satellite receivers that are capable of card-sharing and are sold everywhere online. One popular choice is Dreambox, a Linux-based receiver. Installation of both hardware and software are not that difficult even for beginners.
The steps are varied, though (hook up to PC, insert smart card, download, install CCcam software, configure, and run to connect to CCcam server).
CCcam server, on the other hand, is a protocol that gives access to digital packages (these are the contents of the channels) where the server is connected to the Internet. It works by transferring the encrypted channel signal codes to a network of computers.
Computer communication
Your computer talks to the server which will then send you the decrypted channel codes. This will then give you access to the TV channels not available to you before. The CCcam server also makes it possible to have other subscribers share the same information (the previously unavailable actual channel contents).
The number of available channels depends on where you live, the size of your satellite dish and where it is pointed at.
This service had been actually intended for users who are in countries that don’t have provider representatives and do not have the opportunity of buying subscription to the package they desire.
How the system works
The first requirement is that card-sharing receivers should be able to communicate over a network that is properly configured. It starts with a device that will confirm where the smart card is. Those without the smart card are satellite card-sharing clients.
Another name for card-sharing is control word sharing. This is the method of having many clients (TV receivers) being able to access a TV network on subscription using just one valid card.
Delivery system
The control words for the system is short and small it is easy to deliver to all the different clients through their Internet connection at home. This had triggered the birth of many sharing network groups where users share their subscription cards with the others in the group.
With it, they are also able to receive the channels they want which the user’s card can decrypt as if that user controls and owns every subscription card that is network-connected. There were other networks as well that were created where the server has many legitimate cards connected to it.
Electronic sharing
This is done through the electronic sharing a part of the valid conditional output data of the smart card. In turn, this enables all the clients (recipients) to have simultaneous access to the scrambled DVB streams which are held in the TV network which is encrypted.
Typically, this smart card should be legitimate and must be attached to the host television receiver which has to be digital. Moreover, it must be equipped with software to be able to share the decrypted 64-bit “control word” key over a network like the Internet, for instance.
Once the client gets this key, it is now possible to decrypt the content (which is encrypted) as if they are using their own card.
There are some necessary components needed to start your card-sharing server. This includes the network-based hardware like the Dreambox CCcam receiver. Like a regular Ethernet, these receivers must have an Ethernet connection.
Likewise, these must typically use computer software and other plug-ins that are configured to send and receive codes. The software includes Mgcamd, Newcamd, CCcam, Oscam and Wicard emulators. All of these must support CCcam protocol.
The CCcam server also needs a broadband service. It is not possible to use the CCcam server without a broadband service. The server enables you to get the best stations there are.
The best cardsharing server
These days, getting the best TV contents are now attainable by way of finding the best CCcam and card-sharing server that suits your needs. You can now have the best choice of satellite TV packages to servers that are known for their reliability and steady connections.
The reliability of your server’s steady connections means you shall be enjoying from now on your favorite programs without interruptions, drop-outs and other usual glitches associated with common receptions.
- Published in Articles, CCcam Tutorials, News And Questions
Vu+ Solo review
Perfect For CCcam Server
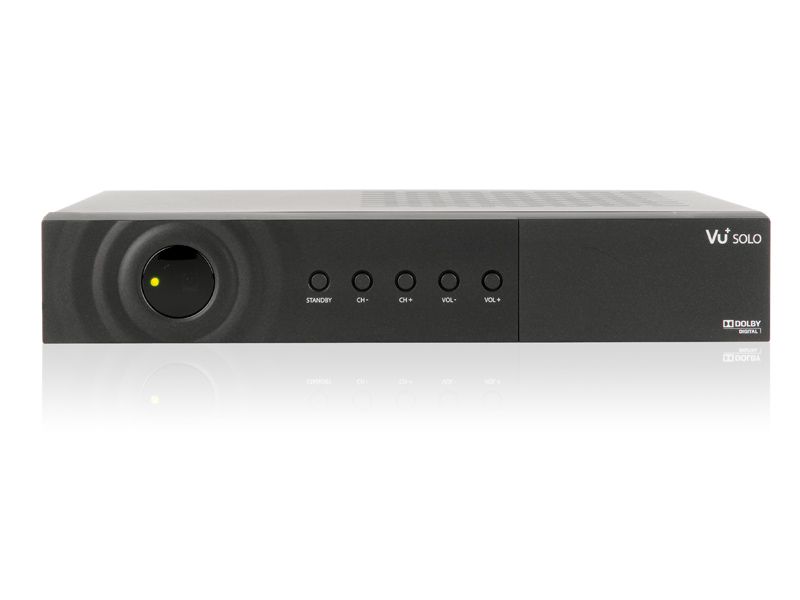
you can install CCcam Server on Vu+ Solo easily and enjoy upmaker cccam performance.
Vu+ Solo review
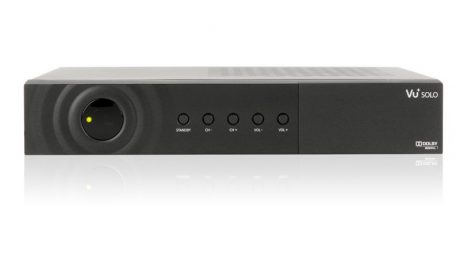
The Vu+ Solo is really a one tuner DVB-S2 receiver Box and therefore High definition tv. just Like any Linux receiver boxes, that one runs a variant from the Enigma firmware – we used the suggested VIX image.
Its fundamental design is unassuming, by having an uncluttered front panel carried out in Matt black. There is no front-panel display, making the appropriate setup menu in VIX fairly redundant. Rather, a few LEDs indicate fundamental receiver status.
Sadly, there is no loop through output, nor are you able to fit an interior Hard disk drive for PVR use, an exterior hard drive is important.
Onscreen shows extended beyond what is understood to be the ‘safe area’, obscuring text and making the receiver a little awkward they are driving. Happily, a compensatory food selection fixed this anomaly following a reboot.
Enigma-issue installation wizards cover language, display calibration as well as networking. The tuner is set towards the outside package you are using – various kinds of LNB and DiSEqC satellite-selection hardware could be covered at this time.
Vu+ Solo review
Searching may then proceed on the satellite or transponder basis. Out of the box the situation with all of receivers running Enigma2, there is no blind search, and PID selection isn’t incorporated. Searches can hold all channels, or simply the disposable ones.
An inside Broadcom 333MHz processor, assisted by 384MB RAM and 128MB of memory, in the Center of the receiver. Searches are, alas, rather slow. luckily , the receiver is more responsive in regular use.
Channels could be sorted by satellite, provider or (user-definable) favorites lists. A multi-funnel ‘timeline’ EPG spans 11 consecutive channels at the same time the choice is really a more in depth single-funnel mode. DVB and XML-downloaded now-and-next and 7-day schedules fall inside the EPG’s remit, just like text searches and timer setting.
Timeshifting and recording are generally supported, out of the box the opportunity to record and examine two different channels on a single transponder.
Multimedia playback – from USB or networked storage products – can be done with a decent selection of formats, however a separate picture viewer application is considered necessary. An array of plug-ins can be obtained.
Conclusion
The image Or seem quality and responsiveness from the Solo can not be faulted. The handset, which looks good and handles well, can also be significant because of its handy shortcut buttons.
If you are following a no-nonsense budget Linux receiver with a few awesome features, the Solo may be worth thinking about.
- Published in Vu+

