A Short Primer to CCcam Server & Cardsharing
A Short Primer to CCcam Server & Cardsharing
One of the best ways of catching your favorite TV programs and other TV contents is through CCcam and Card-sharing. You can watch them in real time as it happens whenever and wherever in the world they are broadcast from.
Europe and Globe
we support all European countries and all countries across the globe. For regular individuals like you and me, the mention of the methods in doing this is intimidating. It would sound as if one should possess a thorough technical knowledge of electronics and must be a complete computer expert.
To cut through the gobbledygook of highfaluting technical language, CCcam and Card-Sharing is simply a system wherein many clients (TV receivers) are allowed to have access to a subscription network with only one valid subscription card.
This is done through the electronic sharing of the subscription card’s data by all the sharers. This enables all the sharing clients to have the same-time access to the scrambled DVB streams (the many signals from the subscribed TV networks) which comes encrypted. (If the access is successful, the contents are available for viewing.)
CCcam is the server that controls the operations. Card-sharing, which is self-explanatory, means one subscription card is used and shared by many users.
Benefits
This technical innovation definitely has benefits to its users, the card sharers. Consider this scenario.
You are flipping the many channels on your TV. You passed by several channels which you have heard about or may have known their contents. Yet, unfortunately, you cannot open and see their contents because they are all locked.
Locked here means these channels are encrypted and are not available for you to view. Your regular satellite dish receiver can only show you your paid-for channels. You cannot unlock (decrypt) the other channels that are closed without paying.
First, your system is not designed to support card-sharing. Second, it is unable to run the software for CCcam protocol.
However, there are now ways to connect your TV system to your chosen CCcam server.
Sharing
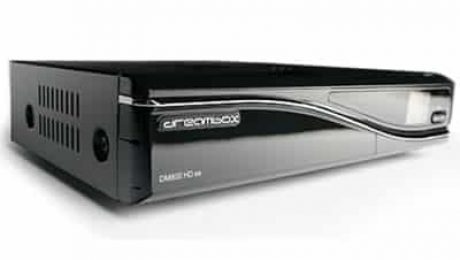
There are now satellite receivers that are capable of card-sharing and are sold everywhere online. One popular choice is Dreambox, a Linux-based receiver. Installation of both hardware and software are not that difficult even for beginners.
The steps are varied, though (hook up to PC, insert smart card, download, install CCcam software, configure, and run to connect to CCcam server).
CCcam server, on the other hand, is a protocol that gives access to digital packages (these are the contents of the channels) where the server is connected to the Internet. It works by transferring the encrypted channel signal codes to a network of computers.
Computer communication
Your computer talks to the server which will then send you the decrypted channel codes. This will then give you access to the TV channels not available to you before. The CCcam server also makes it possible to have other subscribers share the same information (the previously unavailable actual channel contents).
The number of available channels depends on where you live, the size of your satellite dish and where it is pointed at.
This service had been actually intended for users who are in countries that don’t have provider representatives and do not have the opportunity of buying subscription to the package they desire.
How the system works
The first requirement is that card-sharing receivers should be able to communicate over a network that is properly configured. It starts with a device that will confirm where the smart card is. Those without the smart card are satellite card-sharing clients.
Another name for card-sharing is control word sharing. This is the method of having many clients (TV receivers) being able to access a TV network on subscription using just one valid card.
Delivery system
The control words for the system is short and small it is easy to deliver to all the different clients through their Internet connection at home. This had triggered the birth of many sharing network groups where users share their subscription cards with the others in the group.
With it, they are also able to receive the channels they want which the user’s card can decrypt as if that user controls and owns every subscription card that is network-connected. There were other networks as well that were created where the server has many legitimate cards connected to it.
Electronic sharing
This is done through the electronic sharing a part of the valid conditional output data of the smart card. In turn, this enables all the clients (recipients) to have simultaneous access to the scrambled DVB streams which are held in the TV network which is encrypted.
Typically, this smart card should be legitimate and must be attached to the host television receiver which has to be digital. Moreover, it must be equipped with software to be able to share the decrypted 64-bit “control word” key over a network like the Internet, for instance.
Once the client gets this key, it is now possible to decrypt the content (which is encrypted) as if they are using their own card.
There are some necessary components needed to start your card-sharing server. This includes the network-based hardware like the Dreambox CCcam receiver. Like a regular Ethernet, these receivers must have an Ethernet connection.
Likewise, these must typically use computer software and other plug-ins that are configured to send and receive codes. The software includes Mgcamd, Newcamd, CCcam, Oscam and Wicard emulators. All of these must support CCcam protocol.
The CCcam server also needs a broadband service. It is not possible to use the CCcam server without a broadband service. The server enables you to get the best stations there are.
The best cardsharing server
These days, getting the best TV contents are now attainable by way of finding the best CCcam and card-sharing server that suits your needs. You can now have the best choice of satellite TV packages to servers that are known for their reliability and steady connections.
The reliability of your server’s steady connections means you shall be enjoying from now on your favorite programs without interruptions, drop-outs and other usual glitches associated with common receptions.
- Published in Articles, CCcam Tutorials, News And Questions
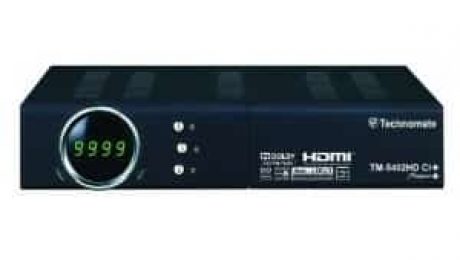
Install CCcam on Technomate
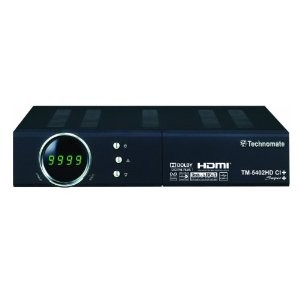
There are two choices to Install CCcam on Technomate :
Choice #1 – Ftp customer is downloaded. For simple use, decide on Filezilla. You need to alter cfg CCcam.located in/var/and so forth/
Choice # 2 – You will utilize a miniweb.
Utilizing a smaller than expected web will permit you to introduce pictures/programming rapidly to your Technomate beneficiary regardless of the fact that you don’t have the foggiest idea about the IP Address in your PC. You have likewise the office to alter CCcam and config records of NewCamd including the reinforcement/restore in your channel list.
Take after the strides:
1. Turn off the AC Power OFF. With the Power Button on the Front Panel, press and hold it and in the meantime, turn the AC Power ON while you keep holding the Power Button. It is important to continue holding the Power Button until 3 numbers appeared on the Front Panel’s Display.
2. These are the remaining 3 numbers speaking to the IP Address of the recipient. Case in point, if the last 3 numbers indicated are ‘164’, then your IP Address will be: 192.168.1.164 or 192.168.0.164. These rely on the switch’s default initial 7 numbers.
3. You can now enter in your Internet Browser the IP Address as underneath:
http://192.168.1.164.
4. After you write the IP address, simply press enter. Look for the accompanying showed on the screen; be that as it may, you can’t duplicate/glue the jpeg pictures so you take it from the container smaller than usual web:« This page guides you in your simple redesign of the recipient.
5. You can update the beneficiary utilizing the most recent firmware effectively at the underneath area:
Redesign Receivers Firmware then select document: alter the config emul;
Snap to alter CCcam and alter the/var/and so on/CCcam.cfg;
Snap to alter Mgcamd and alter the/var/keys/newcamd.list;
Alter NewCS for just BoxKey and snap RSA and alter by the
/var/tuxbox/config/newcs.xml; and
Click and alter Camd3 and alter the/var/keys/camd3
.config
6. For reinforcement administration:
Administration and Bouquet Backup/Restore;
Click reinforcement; snap to by and by alter the reinforcement documents in the collector; and
Restore the select record; restore documents to collector.
7. At long last, tap on the “Download” catch to begin the redesign.
Make the most of Our Full Package CCcam Server .
Install CCcam on Technomate
[/fusion_text][/fusion_builder_column][/fusion_builder_row][/fusion_builder_container]- Published in Articles, CCcam Tutorials
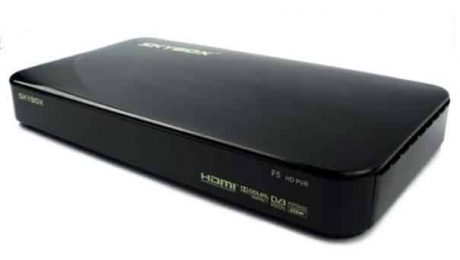
Install CCcam on Skybox f3 or f5
Today, all homes have their own TV for amusement where they can watch their most loved motion pictures and other intriguing appears. Full HD administrations are given by Cccam server as they offer the best card sharing administrations to numerous countries around the world. CCcam server as a sort of cardsharing convention gives you the privilege to get to computerized bundles by means of the Internet. Exchanging the scrambled channel codes from a system to PC connected to the server’s principle capacity.
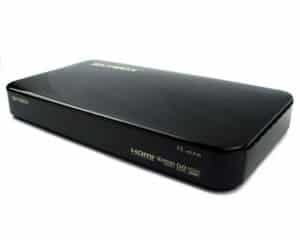
How To Install CCcam on Skybox f3 or f5
what’s more, run this case. Simply take an ideal opportunity to peruse the directions and do it orderly.
1. Config (CCcam.cfg) document containing your CCcam lines. This design document is contained in your supplier else; you need to make one yourself.
2. Place this cfg document on your USB blaze and connection it to one of your USB terminals found at the back of your Skybox. Click it on.
3. At that point press the Menu on your remote control, continue to network nearby setting to Camds Setup. Click CCcam Client Setup. On the off chance that you can’t discover it, press 6666 to make it show up.
5. It is the ideal opportunity for you to snap Update Files utilizing USB to empower your case to begin perusing the usb streak. Another choice – CCcam cfg, continue and squeeze OK and watch a green tick show up.
6. In conclusion, tap the remote control Yellow catch to peruse the CCcam. Cfg record from your USB. In the event that you are effective, you will see this sign showing up: (a) Find New Account; (b) Save Data OK; and (c) Read All Finished.
Presently exit from all settings, switch your container off/on utilizing remote control power catch.
Congrats! It is a simple occupation all things considered. You are done as you’ve setup a CCcam Server account on your Skybox f3 or f5.
Install CCcam on Skybox f3 or f5
- Published in Articles, CCcam Tutorials
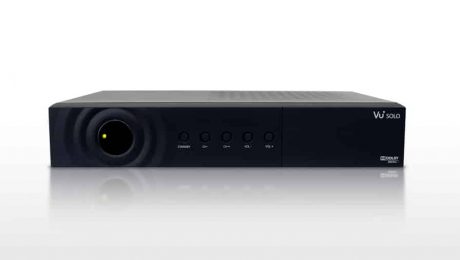
Install CCcam on VU+ Solo or DUO
A FTP customer is most fundamental to use in introducing Solo or Duo in your CCcam.cfg record. The utilization of FTP is recommended. As the acronym of File Transfer Protocol, FTP is outlined as programming to move documents between two PCs by means of the Internet. It is setup on your PC/portable PC and connected to the Internet. FTP customers, as FileZilla, CuteFTP or SmartFTP think that its simple to transfer/download a record and overseeing documents on the server.
The most effective method to Setup CCcam Server on VU+ Solo or DUO
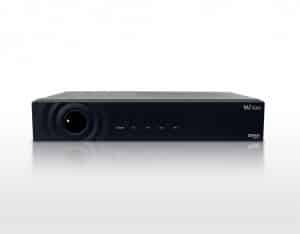
A FTP customer is most crucial to use in introducing Solo or Duo in your CCcam.cfg record. The utilization of FTP is proposed. As the acronym of File Transfer Protocol, FTP is outlined as programming to move documents between two PCs by means of the Internet. It is setup on your PC/tablet and connected to the Internet. FTP customers, as FileZilla, CuteFTP or SmartFTP think that its simple to transfer/download a record and overseeing documents on the server.
Vu+-Solo
Ventures to exchange the cfg document of CCcam in the organizer of/var/and so on/:
1. In the event that there is as of now a CCcam.cfg document in your area, basically right tap the record and tap the alter to set in it your C-lines to spare it.
2. You can get the cfg document CCcam. from your administration supplier.
3. On the off chance that your C-lines are prepared, make your CCcam.cfg record yourself by clicking here!
4. CCcam Server will start to work after you have rebooted your crate.
Step by step instructions to introduce CCcam 2.1.4:
1. To get to the addons menu, simply press the green catch on your remote.
2. Settle on theTSpanel.
3. At that point to the addons.
4. To TunisiaSat Vuplus Addons
5. To Cam-BlackHole
6. Pick the Cccam-2.1.4-full-blackhole_04.04.2013_all, and after that squeeze alright.
7. Sit tight for the establishment.
8. Restart le vu+.
Instructions to empower CCcam 2.1.4:
1. The remote control blue catch is utilized to get to blue board empowering the softcams together with numerous different things.
2. When you made the left and right places of the blue board, Common interface CCcam 2.1.4, is empowered and checked, then squeeze alright.
3. The CCcam 2.1.4 is at long last enacted.
Notice:
All your information on the Vu + must be eradicated.
Amid the blaze, never unplug the decoder.
This aide is planned for clients in the propelled level.
This aide is planned to help you to set up CCcam Server on VU+ Solo or DUO for better survey.
Install CCcam on VU+ Solo or DUO
- Published in Articles, CCcam Tutorials
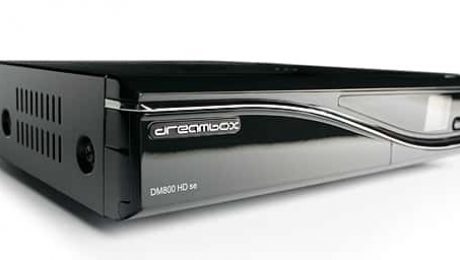
Install CCcam Server on Dreambox 800
Establishment guide gives directions on the most proficient method to physically introduce CCcam to Dreambox 800 . The primary part of this aide gives general directions, while the last area contains a rundown of addendums that give more point by point establishment notes for particular framework arrangements and different less basic employments of the product.
Manual Install CCcam Server on Dreambox 800 is another choice to enhance the operation of your server.
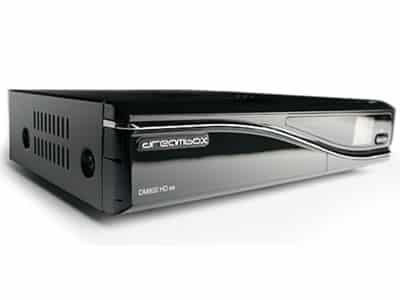
Simply take after these strides:
Step 1-Download CCcam into Dreambox 800 “tmp” envelope. On the off chance that you are making utilization of different documents, simply ensure that they don’t end in .zip or .tgz as they won’t work in this technique. The augmentation ought to just be .tar.gz which is an executable document.
Step 2-Proceed to the Blue Panel and select the “Record Browser”.
Step 3-You will now pick the area of your record where it was transferred; for case in usr/tmp/.
Step 4 – Opt for the CCcam_2.3.0.tar.gz record then squeeze alright to physically introduce it or you can press the yellow button , which will do likewise.
Step 5-After restarting your Dreambox. It is finished. Appreciate!
On the other hand Cardsharing can be introduced physically utilizing telnet:
1. You can click and download Enigma 1 e1-cccam_2.2.1_101122.tar.gz or click and download Enigma 2 e2_CCcam_221_onlybin_bh.tgz.
2. Subsequent to opening dcc customer, connection to the IP location of Dreambox 800. Set the “root” as username and use “dreambox” as your secret key. Move towards the/tmp registry. Spare document *.tar.gz at the right hand side of your dcc customer for your CCcam Server then exchange your dreambox to the/tmp envelope.
3. Continue go to DCC telnet and to install CCcam.
4. To introduce, click enter. At that point press the Blue base on your remote dreambox in the wake of picking either right or left of the select Cccam_2.21.
5. When you made your choice, then press the OK button for quickly it will begin the chose Cam.
The establishment is finished. Your CCcam Server with Dreambox 800 is prepared to keep you the best in TV seeing.
Install CCcam Server on Dreambox 800
- Published in Articles, CCcam Tutorials
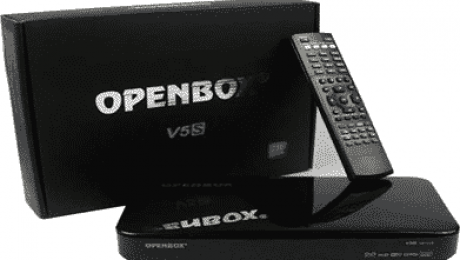
Install CCcam Server on Openbox V5s V8s V8SE
Beside getting a charge out of a definitive in TV excitement with your CCcam, another real point of interest is that your record works all over the place over the globe dissimilar to others that have restricted application. You likewise have the benefit of opening all channels. You don’t have to stress over much solidifying or being disconnected from the net the length of the server is routinely kept up.
The uplifting news is that CCcam Server can be setup with Openbox V5s V8s V8SE .
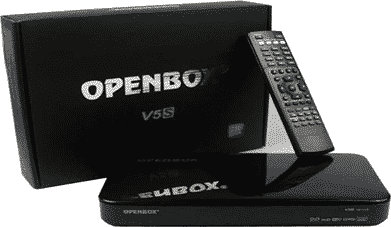
A star is not expected to introduce it for you. Simply take after this basic strategy:
1. Start by making a cfg CCcam. Record in your Clines and duplicate it onto a USB stick.
2. At that point you need to associate the USB stick of the usb port on the crate.
3. Continue to Main Menu, then go to the System Setup>Access Control>CCcam Client Setup.
4. At that point from here, you tap the Update Files by USB.
5. Take a gander at your USB drive content. Stay on cfg CCcam and press the Red catch.
6. In the case of all is well, the framework will appear: Now stacking … Please Wait … cfg. CCcam. Load Data OK.
7. When it is done, do a reversal to the forerunner page and stay on “cfg CCcam” then Edit” and press the OK catch. On the off chance that it is required, the secret key will be written.
8. From here, press the CCcam Edit Option.
9. As of now, when you see the Clines recorded, press the OK catch found on every cline to enact them.
10. The time has come to exit on that page by controlling off the case for 10 seconds using the back power button.
11. Once your crate has been booted prepared, you are good to continue.
Most recent models of Open Box with IPTV are among those exceedingly prescribed to be setup with Cardsharing . It is straightforward and easy to understand so it can be setup with different devices.
Install CCcam Server on Openbox V5s V8s V8SE
- Published in Articles, CCcam Tutorials
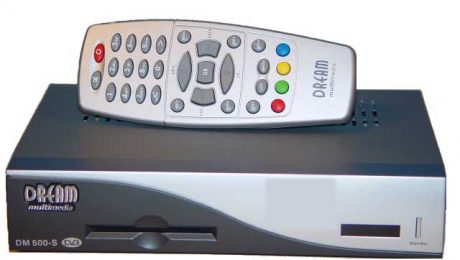
Install CCcam Server on Dreambox 500
The Dreambox 500 was produced by many designers around the globe to be a definitive machine. In case you’re searching for a unit that is effective and something to have a ton of fun on, this is the unit for you. Dreambox can be connected to your CCcam Server at home to watch and record your most loved TV programs right onto your own hard drive. It is recommended that in the event that you exchange the CCcam.cfg document into your dreambox500, you need to utilize a FTP customer!
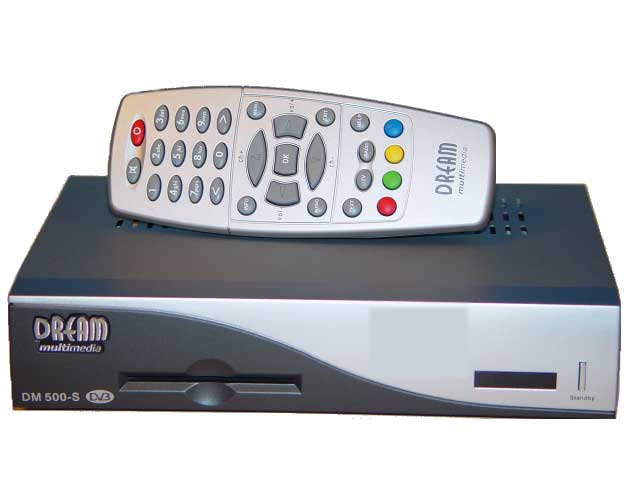
Exchange the CCcam.cfg record into the/var/and so forth/organizer. On the off chance that you as of now have a CCcam.cfg record in that area, essentially right tap the document and snap alter to put your C-lines in it and recovery the record. Get the CCcam.cfg document from your administration supplier. You can simply click here to find how to make the CCcam cfg record with your C-lines. Reboot your case and you’re Cardsharing will begin working.
Since this is an easy to use gadget, you can without much of a stretch setup CCcam Server on Dreambox500 by simply taking after these strides:
1. Start at the blue board by squeezing the blue button on remote.
2. Go to Addons and view all classes of download containing cam and cam-config. Continue first to cam then introduce cccam 2.2.1 or the most recent accessible rendition.
3. Taking after cam-config and introduce cccam-config 2.2.1 or utilize the most recent form that is accessible.
4. From the blue board go to the highest point of your board and utilize left/right catches. You can look to CCcam 2.2.1 or whatever form you have introduced previously.
5. Presently press the Green catch to begin CCcam. From here, you simply ahead and arrange CCcam.
By utilizing Dream Box, you will have the capacity to watch a wide range of channels. With this consolidated to your CCcam Server, you can even watch the most recent game recreations anyplace in the globe. CCcam an emulator for your Dreambox furnishes you with the chance to watch the channels you lean toward.
also you can watch this video :
Install CCcam Server on Dreambox 500
- Published in Articles, CCcam Tutorials
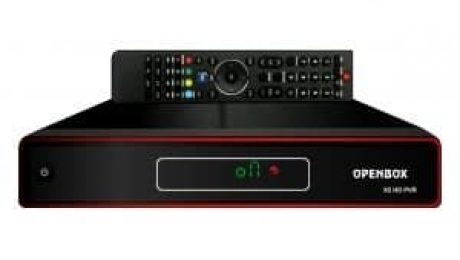
Install CCcam on Openbox X5
Beside getting a charge out of a definitive in TV excitement with your CCcam Server , another real point of interest is that your record works all over the place over the globe not at all like others that have restricted application. You likewise have the benefit of opening all channels
You don’t have to stress over much solidifying or being logged off the length of the server is frequently kept up.
So How To Install CCcam Server On Openbox X5.
1. Start by making a cfg CCcam. Document the Clines and have it duplicated into the USB stick.
2. At that point you need to connect the USB stick of the port for usb on the case.
3. Originating from Main Menu, continue toward System Setup>Access Control>CCcam Client Setup.
4. At that point from here, you tap the USB Updated Files.
5. You will have the capacity to see USB drive content. Stay on cfg CCcam. Also, tap on Red button.
6. In the case of all is well, the framework will appear: Loading … Please Wait . Load Data squeeze OK.
7. When you did it, swing back to the precursor page and remain focused “CCcam.cfg” and after that tap “Edit”. A short time later you press the OK . On the off chance that required, you can sort the Password.
8. Click the CCcam Edit from here.
9. As of now, you will have the capacity to see your Clines recorded, press the OK catch that you see on each cline so they are actuated.
10. Presently is the minute to exit from that page by controlling off the container for 10 seconds while utilizing the power button.
11. Once your case has been booted prepared, you are prepared to continue.
Most recent models of Open Box with iptv are among those exceedingly prescribed to be setup with CCcam server. It is basic and easy to understand so it can be setup with different devices.
Install CCcam on Openbox X5
- Published in Articles, CCcam Tutorials
How to Install Dreambox Control Center
This Method is for dreambox users : Most clients are looking for a simple way to manage their receiver boxes via a flexible and well FTP program. Some of you might use Filezilla or any other FTP clients but here we suggest you use the best FTP program which is designed for receiver boxes file management. You can manage or install your images, plugins or any other thing you want to upload or download from your box. One of the most common purposes is uploading/editing CCcam.cfg file.
( if you don’t know how to create CCcam.cfg file click here )
This Method is Created By Upcccam – How to Install Dreambox Control Center
First of all click here to download the zip folder containing DCC version 2.96
Now extract the folder and open DCC.

1.First assign your box user/pass then the preferred language. Connection Type must also be chosen.
Note: If you connect to your box directly from your laptop/pc choose “Direct Crossover” but a router is on the way “Router” must be chosen.

2.Now you need to assign the proper IP Address of each device.
Note: If you know the correct IP address of your box and router, there is an empty space above the Search button. Mouse over there and type the IP address.
If you dont know the correct IP address, click on Search and let the DCC scan and find the correct IP addresses.
Now I`m going to scan for the right IP address of my box. I click Search

3.At the top you can see the Address range where you can assign the range of IP address which your Network is based on.
My range is 192.168.2.1-254. Clicking on search will start the scanning process.

4.Scanning process is done. 3 IP`s have been found.
the IP ending in 2.1 is my Router, the one with 2.7 is my Box and 2.99 is another device.
So I double click on the second IP in the list to assign it as my box IP in DCC.
Do the same procedure for your Router.

5.Now that we have assigned proper IP`s on my device, we`re gonna click on Reconnect to see if it`s working.

6.All signs show that our connection is healthy and we are connected to our box through our router.

7.So let`s go to the FTP section and see how we can manage our files between pc/laptop and the box.

8.As you can see this section is divided into two halves.
Right side is our Receiver box and the left side is our PC/Laptop.
You can simply exchange between these two using the two arrows in the middle.
If you keep DCC folder, each time that you open it, it automatically connects to your box and you can do your edits.
How to Install Dreambox Control Center
- Published in Articles, CCcam Tutorials, Dreambox
How to Create CCcam.cfg file
This Method is created by upmaker.
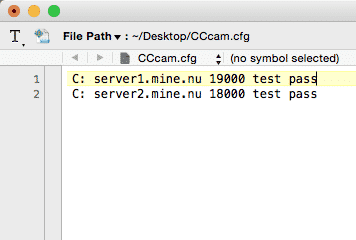
a lot of linux based sattelite receivers need CCcam.cfg file with your ccCam lines information in order to work with Cccam Server Or Cardsharing… Clients can ask their providers for a CCcam.cfg file but no more . you can do it by yourself and getting things done…
Don’t worry this method is pretty easy to understand and anyone can do it..
So we’re going to start :
Step One : Create A Plain Text Document
Step 2: put your Cccam Lines , Ports , UserName And Passwords exactly like shown below.
( The Normal Format For Showing Lines)
C: server port user pass
Step 3: Now From The Top left of your Text Editor (Notepad or TextEdit) , Click File -> Save as
Step 4: There is a new window coming up , then from the below next to the TYPE File, select ALL Files .
Step 5 : Then from the top of it in File Name write CCcam.cfg and save it .
Step 6 : Looking for More Steps ? Sorry for disappointing you 🙂 Thats it, your CCcam.cfg file is ready to be used
Important : remember it`s vital that the first two C`s be in Caps Letters.
How to Create CCcam.cfg file
- Published in Articles, CCcam Tutorials

